Bilingual English / Chinese Labels for School Supplies + DIY Storage Cans

August means it’s time to get ready for school, and I’m excited to share these easy-to-make art and school supplies storage cans! To keep those pencils, markers, scissors, and other writing utensils extra organized, I hope our printable English and Chinese labels for school supplies can help!
Try this: Kids Art Cart, Storage System, and Organization Tips
Bilingual English / Chinese labels for school supplies + DIY storage cans
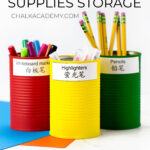
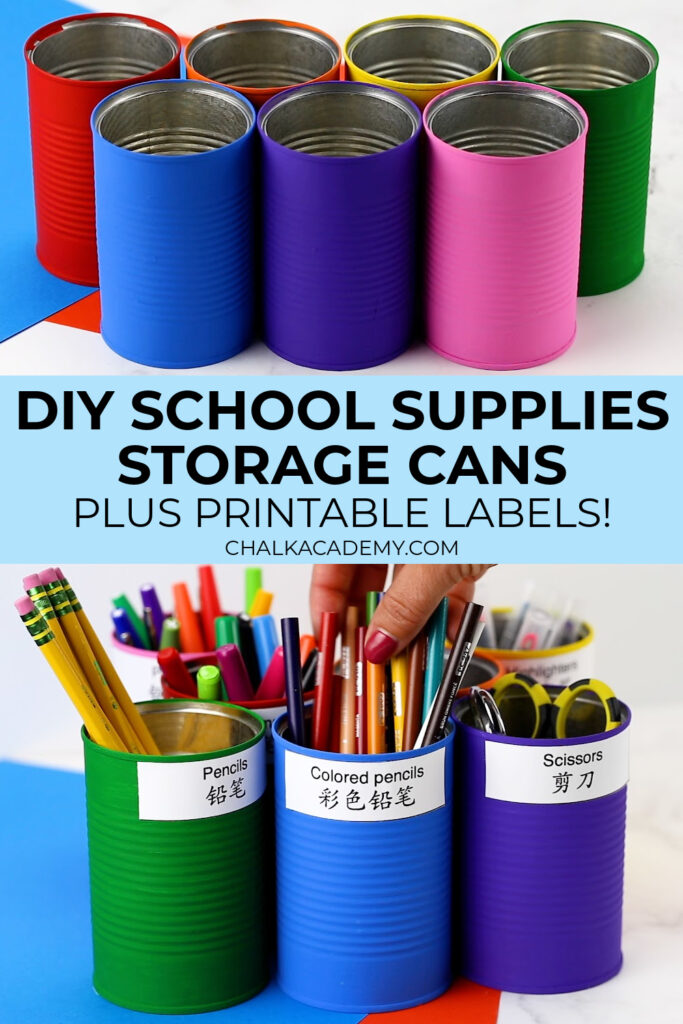
A couple years ago, my kids and I made a set of these colorful, rainbow art storage containers with recycled tin cans. I credit this simple idea to my own parents, and I can vividly picture my dad making a tin pencil can for my school supplies over 30 years ago. While my parents often upcycled materials out of financial necessity and to avoid waste, I’m so glad that recycling is “on trend” these days.
Having a designated color for each section has been SO helpful for my kids to know where school supplies should go. Since my kids use our dining table for everything, clearing the table of art and school supplies is a necessary part of the daily routine.
In addition to verbal reminders, labels are helpful visual cues for where to put things in addition to using our family’s languages, English and Chinese.
Initially, we labeled our art supplies with painter’s tape and Sharpie markers. Because my handwritten words were too small for my younger child to read, we’ve updated our storage with our printable bilingual school supply labels.
We’ve since gifted a set of these vibrantly colored cans with favorite art supplies for a bilingual teacher friend. I’ll share pictures and a video of the easy DIY steps with you here!
Try this: Create a Print-Rich Environment with Labels that Promote Literacy
Important translations for school supply labels in Chinese and English
For families who are learning Chinese with their kids like me, here are translations in simplified Chinese, traditional Chinese, and Hanyu Pinyin:
- Art and writing
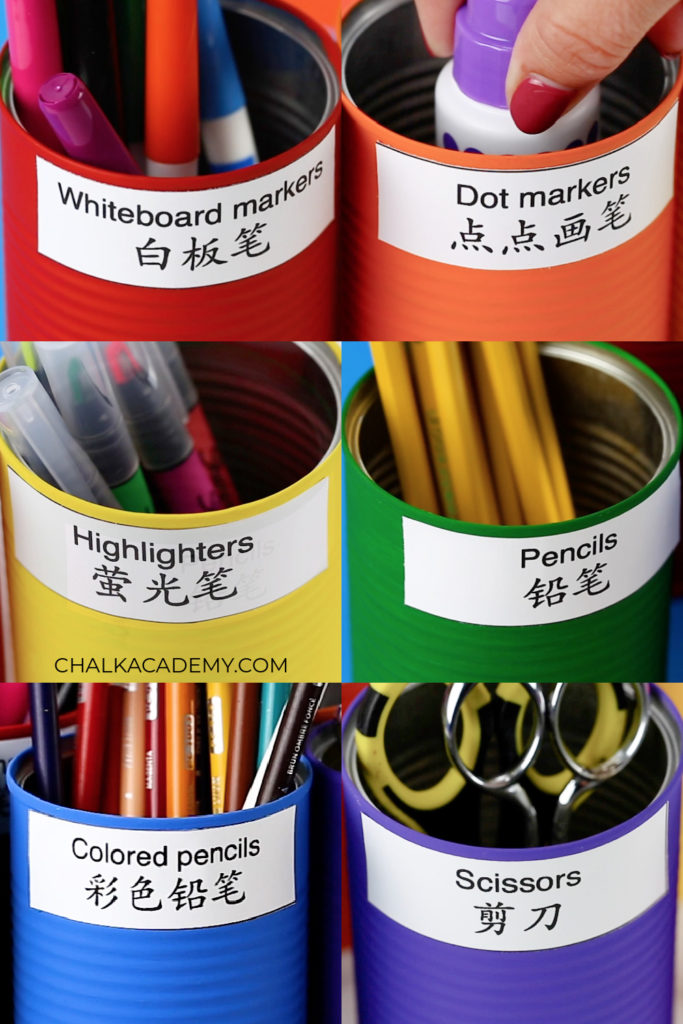
- Pencils 铅笔 / 鉛筆 (Qiānbǐ)
- Pens 圆珠笔 / 圓珠筆 (Yuánzhūbǐ)
- Colored pencils 彩色铅笔 / 彩色鉛筆 (Cǎisè qiānbǐ)
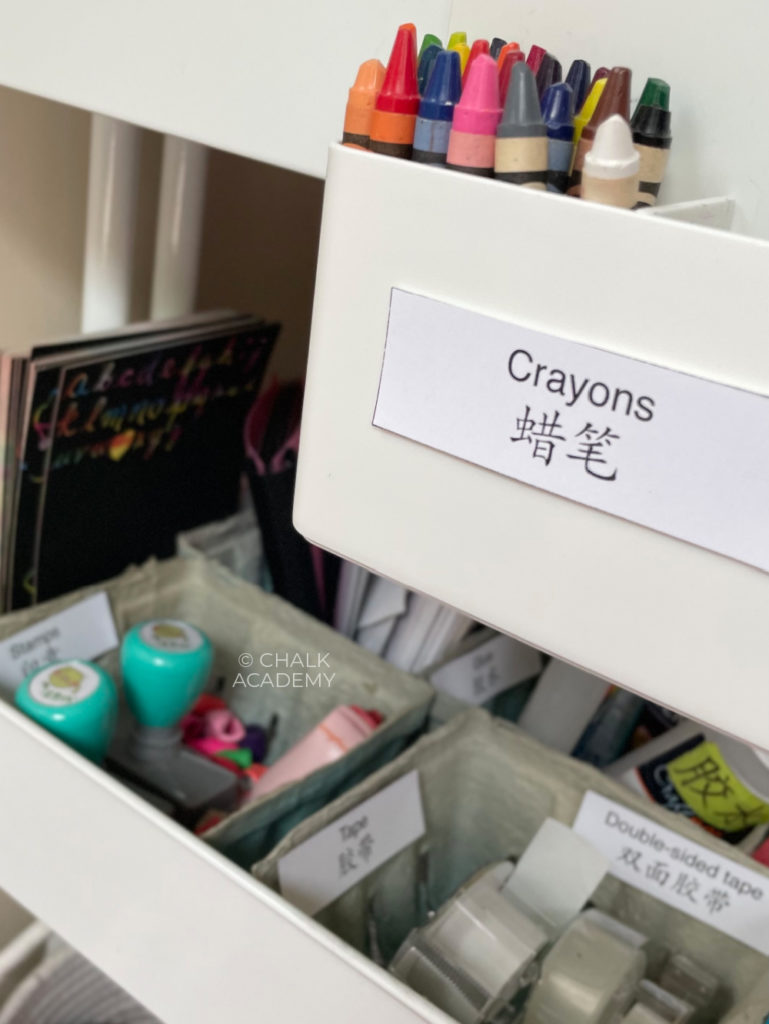
- Crayons 蜡笔 / 蠟筆 (Làbǐ)
- Markers 马克笔 / 馬克筆 (Mǎkè bǐ) in China or 彩色筆 (Cǎisè bǐ) in Taiwan
- Highlighters 萤光笔 / 螢光筆 (Yíng guāngbǐ)
- Whiteboard markers 白板笔 / 白板筆 (Báibǎn bǐ)
- Dot markers 点点画笔 / 點點畫筆 (Diǎn diǎn huàbǐ)
- Paint 颜料 / 顏料 (Yánliào)
- Paintbrush 画笔 / 畫筆 (Huàbǐ)
- Permanent marker 记号笔 / 記號筆 (Jìhào bǐ) in China or 奇異筆 (Qíyì bǐ) in Taiwan
- Stamps 印章 (Yìnzhāng)
- Adhesives
- Tape 胶带 / 膠帶 (Jiāodài)
- Double-sided tape 双面胶带 / 雙面膠帶 (Shuāng miàn jiāodài)
- Glue 胶水 / 膠水 (Jiāoshuǐ)
- Glue stick 胶棒 / 膠棒 (Jiāo bàng)
- Stickers 贴纸 / 貼紙 (Tiēzhǐ)
- Corrective tools
- Erasers 橡皮 (Xiàngpí)
- White out 修正液 (Xiūzhèng yè)
- Rulers 尺子 (Chǐzi)
- Stationary
- Paper 纸 / 紙 (Zhǐ)
- Colored construction paper 手工彩纸 / 手工彩紙 (Shǒugōng cǎi zhǐ)
- Scrap paper 废纸 / 廢紙 (Fèi zhǐ)
- Writing Paper 作文纸 / 作文紙 (Zuòwén zhǐ)
- Post-it notes 便条纸 / 便條紙 (Biàntiáo zhǐ)
- Notebooks 笔记本 / 筆記本 (Bǐjìběn)
- Index cards 索引卡 (Suǒyǐn kǎ)
- Sharp supplies
- Pencil sharpener 铅笔刀 / 鉛筆刀 (Qiānbǐ dāo)
- Scissors 剪刀 (Jiǎndāo)
- Hole puncher 打孔器 (Dǎ kǒng qì)
- Stapler 订书机 / 訂書機 (Dìng shū jī)
- Paperclips 回形针 / 回形針 (Huíxíngzhēn)

Download printable art and school supply labels
- English labels for school supplies
- Simplified Chinese labels for school supplies (+/- English and Pinyin)
- Traditional Chinese labels for school supplies (+/- English and Zhuyin)
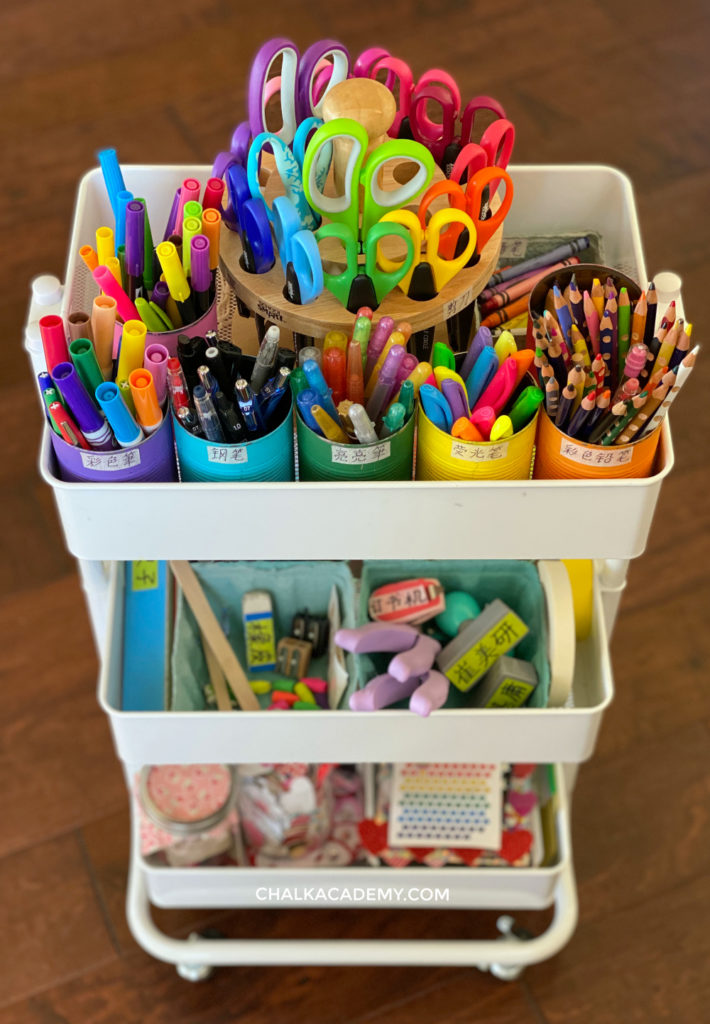
Materials for DIY art and school storage cans
- Masking tape
- Acrylic paint: Apple Barrel and Craft Smart are our favorites!
- Cans
- Paintbrush or sponge brush
- Paper trimmer or scissors
- Optional:
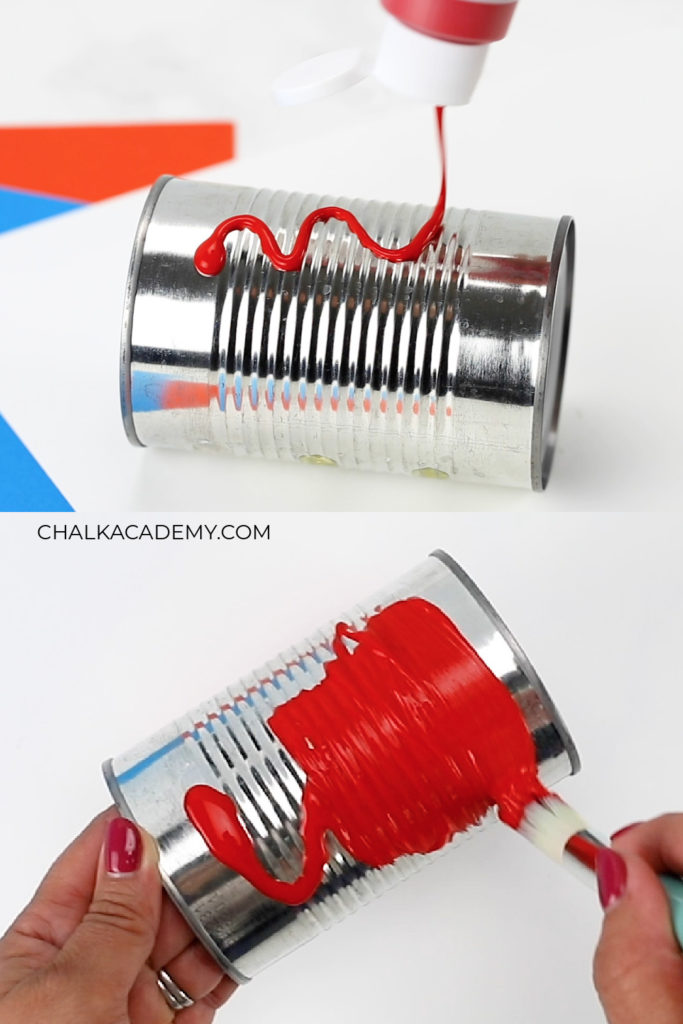
How to make DIY art and school supplies storage cans
- Remove labels from cans
- Use adhesive remover to take off any sticky residue from labels
- With paintbrush, add 3 layers of paint, letting each coat dry before applying next layer
- Print art and school supply labels in desired language
- Cut and affix art and school supply labels onto can
- For extra protection, cover any sharp edges inside the can with painter’s tape or masking tape.
- Put corresponding art and school supplies in can

Printable bilingual English and Chinese labels for school supplies
Here’s a close-up photo of some of the labels and cans in our school supply teacher gift! To keep things visually clean and simple, these school supply labels are intentionally black and white with no distracting background patterns or icons.
DIY art and school supplies storage cans video tutorial
Get the printable art and school supply labels here
I’d love to hear how your art and school supply storage works and if your kids participate in the DIY activity!
If you try this activity, please let us know in the comments below! What age(s) are your kid(s), and how did it go? We’d love to hear about your learning experience!
What size tin cans did you use? Would be even more helpful if you could share the foods the cans used to hold! Thanks!
Hi Lisa! We used 15 oz cans. Our family eats a lot beans, and cans with garbanzo beans tend to be easier to wash completely clean compared to stickier foods like black beans. Hope that helps! 🙂
Thank you so much! 🙂
I would like to receive you labels school supplies storage with the simple Chinese but the English part blank. My kids are French and I would love to have the a French/ English version.
Frenhch/Simple Chinse version
I’m worried about the sharp edge inside the can. Did you sand it down to make it smooth, or cover it with some material?
Hi Christine, great question. For extra protection, you can cover any sharp edges inside the can with painter’s tape or masking tape. Our cans happened to be smooth with our can opener, but I remember my father always had covered the inside edge of his DIY pencil cans.